Images with Impact – Contrast in Nature

Explore how haze affects the contrast in distant objects, how humans respond and how that knowledge can be used in your photographs.

Last year I started a series of articles under the general theme of Images with Impact. In it we are discussing things you can do with your images in Lightroom and Photoshop to enhance their impact. When I got to the topic of contrast I came to an abrupt halt. The more I thought about contrast, the more I wanted to begin that discussion with some real examples from nature. But to do that, I needed some photographs that illustrated what I wanted to share with you. And in Southern California, the types of photographs I wanted are only possible in winter. But it’s winter now. And I’ve been able to capture the photographs that I want, so now we’re picking up the series again.

What distinguishes a photograph created by the serious student of photography from one taken by a casual photographer? Many things to be sure. But one thing that stands out is a sense of clarity, a clear quality. The casual photographers’ photographs are just what the camera captures and are often like looking through a bit of haze and I don’t mean that they are out of focus. It’s the light. The effect may be subtle but it is very real. A more accomplished photographers’ photographs have a special quality to them, a quality that engages us, that draws us in and holds our attention. You might describe it as a crisp quality.  (You can click on the photographs to enlarge them.)

CRW_9603

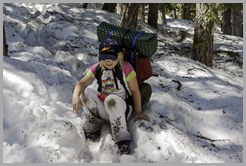
(My daughter some years ago as we hiked out of a late spring backpacking trip in the local mountains.)

The serious student of photography skillfully applies contrast in the digital darkroom to achieve this look. But before getting in to how this is done, let’s step back and take a look at how we respond to contrast not only in photographs but also in nature.

In the following discussion I will use examples from nature to illustrate the affect contrast has on us. The idea is to understand how it works so that we can more effectively apply this knowledge to our photographs.

Continue reading “Images with Impact – Contrast in Nature”

(356)

Making a Photograph – A New Approach to Tonality Adjustments

Watch as a photograph of an icon of Zion National Park is made.

For some time now I’ve been using and teaching a process of working on photographs in Lightroom. It consists of basically four steps: manual adjustments, tonality adjustments, hue adjustments and finally saturation adjustments. Quite some time ago I had the brilliant idea of converting the image to black and white before doing the tonality adjustments. The technique I used was the B & W tab in Lightroom’s HSL group.  Once the tonality adjustments were done, the image would be converted back to color and the process continue.

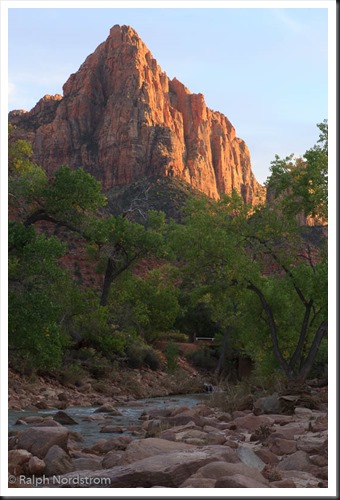
It didn’t work out because when I converted the image back to color, the colors were so oversaturated and unnatural that the image looked horrible. It was just easier to do the tonality adjustments on the color image. So I quickly gave up on that technique. But the other day I was reading an article in Popular Photography magazine that rekindled this idea. It took a different approach. It turned the image to black and white by setting the Saturation adjustment to -100. Now the author did this in the middle of the process but I thought that if I applied this to my process and did that at the start it just might work. So I was eager to give it a try. Let’s try it with this image of the Watchman in Zion National Park.

utah_141010__SM32783 This is the original raw file. I haven’t done anything to it yet. It doesn’t need any mechanical adjustments. These consist of removing spots, straightening the image, maybe some noise reduction and the final crop. But since none of these are required we can move on to the tonality adjustments.


Continue reading “Making a Photograph – A New Approach to Tonality Adjustments”

(4930)

Is That What Your Camera Saw?

Should photographic art be what the camera sees? Or something else…?

Occasionally at art festivals a visitor to my booth will point to one of my photographs and ask, “Is that what your camera saw?”  This question points out a common misunderstanding about the physics and art of photography.

Those of us who are serious about our photography capture our digital images in RAW file format.  That’s a format that does a minimal amount of processing on the image before it saves it to the memory card.  It is more like what the camera sees.

The other format is  JPEG and is not what the camera sees but rather a highly processed image that is controlled to a large extent by the settings the photographer sets in the camera – settings like sharpness, contrast and saturation.  So if the photographer likes saturation he just has to up the saturation setting in the camera.

JPEG is much closer to the photographs that were captured in the wonderful days of film.  Each different type of file had its own unique way of responding to the scene.  Kodachrome film was great for reds while Ektachrome was perfect for blues.  Fujichrome was prized for its treatment of greens and its high contrast.

So what did the film camera see?  The question is really, “What did the film see?”  Was it a faithful documentation of reality?  Not in the least.  The same can be said for JPEG digital files.  They are no more a faithful documentation of reality than film was.

The fact is, RAW files are closer to what the camera saw than film or JPEG files ever were or will be.  And, as one workshop participant put it to me, “I don’t like shooting in RAW because the photographs are so plain and uninteresting.”  There you go.  What the camera sees, exactly what the camera sees, is often plain and uninteresting.

So the physics of digital images captured in RAW format is that the images are the closest to what the camera sees.  But from an artistic point of view, these images generally do not speak to us.  These are documentation but that’s not art; art is interpretation.

Now, a RAW file is the perfect starting point from which to create art.  It is neutral, unbiased and open to the artist to express what she saw, what she experienced that inspired her to set up the camera and compose the image, that led to the decisive moment that the shutter was pressed.

In the days of film we relied on our selection of the type of film that would do the best job of rendering particular situations.  In the digital era we have much more powerful tools that we ever had with film – Lightroom, Photoshop, Photomatix and all the wonderful software that we have access to that allows us to express our vision, our interpretation of reality.

So, are my photographs what the camera saw?  Not at all.  They are what I saw.


We do photography workshops.  Come on out and join us.  Click here to check us out.

You can also check out our photography.  Click here.

(711)

How to Photograph the Coastal Redwoods

The Coastal Redwoods of Northern California have a beauty that is inspiring. But capturing them in a photograph is much harder than it may seem. Come with me to explore ways to capture their grandeur.

California is blessed with two species of redwoods, the Giant Sequoia (Sequoia giganteum) of the Sierra Nevada Mountains and the Coastal Redwoods (Sequoia semperverins) along the California coast from the Oregon border to 150 miles south of San Francisco.  These awe-inspiring trees are both a joy and a challenge to photograph.  I recently spent a week in Crescent City in Northern California photographing the Coastal Redwoods and leading a photography workshop there.  I’d like to pass along some of the techniques we employed to capture photographs that do these majestic trees justice in breathtaking but often very difficult light.

Continue reading “How to Photograph the Coastal Redwoods”

(7864)

Lightroom Tutorial – Workflow Made Easy

Simplify your Lightroom workflow with these easy steps.

Lightroom is a great tool. It’s quick and easy to use – once you get the hang of it. But sometimes mastering the workflow, the steps you go through to take a raw file to a ‘final’ image, can be a bit daunting.

Let me say up front that Lightroom is an important part of my workflow but it’s not the only part.  Every photograph I work on starts in Lightroom but is completed in Photoshop.  Nevertheless, Lightroom gets a photograph to about 80% of the final product.  I know many people who use Lightroom exclusively and Photoshop only in rare circumstances if at all.

So back to the workflow.  Can it really be made easy?  Yes it can.  There are four major steps (not counting import – see Lightroom Tutorial – Importing Photographs):

  1. Mechanical adjustments like dust spot removal and cropping
  2. Tonality adjustments
  3. Hue adjustments
  4. Saturation adjustments

Let’s skip the first step and start with the second.  The example will be in Lightroom 4.

Continue reading “Lightroom Tutorial – Workflow Made Easy”

(7135)

Making a Photograph – Black and White Points

Add snap to your photographs by adding contrast. This step-by-step shows you how to set black and white points in Lightroom.

There are a lot of instructional books on how to use Lightroom, Photoshop, Photoshop Elements and the like.  They provide a comprehensive and in-depth review of the various adjustments and filters available in these powerful tools.  And as such they serve as excellent references.  I own many of these fine books.

Now, a lot of workflows are built around the concept of seeing what needs to be fixed next and fixing it.  I advocate a more structured approach; namely, fix the tonality first, then the hue and finally the saturation.  See my recent post on Workflow.  But I often hear the statement, “I look at my photograph and just don’t know what to do.”  Many people often don’t know where to begin.

So I want to take a different approach.  I want to look at an image and identify what it needs and then talk about the various techniques for achieving it.  In other words, I want to start with the question, “What makes a compelling photograph?” and go from there.  It doesn’t help to know all of the tools and tricks available in Lightroom and Photoshop if you don’t know when to use them.

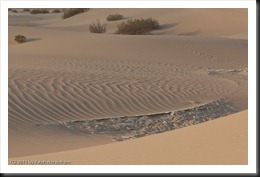
We’ll start with this image.  It is photographed in the Mesquite Flats Dunes of Death Valley.  The dunes provide an inspiring variety of compositions and ligh.  (You can click on this and all other images in this post to enlarge it.)

BP WP Dunes-1

Let’s start by examining the images tonality and see what improvements can be made.


Continue reading “Making a Photograph – Black and White Points”

(11828)

Lightroom Tutorial – Workflow

An overview of a very effective Lightroom workflow.

There are about as many definitions of “fine art photography” as there are people who call themselves “fine art photographers.”  For many of us, fine art photography is an expression of our view of the world.  Much of what we see in the world is captured in the images we capture in the field.  But that’s not the whole story.  Why?  Because the true expressive quality of our photographs comes to life in the post processing – the digital darkroom if you will.

Continue reading “Lightroom Tutorial – Workflow”

(2788)