Making a Photograph – Taking Flight

Follow all the decisions and resulting adjustments that went into the making of an expressive landscape photograph using Lightroom Classic.

A Desert Scene

clip_image002

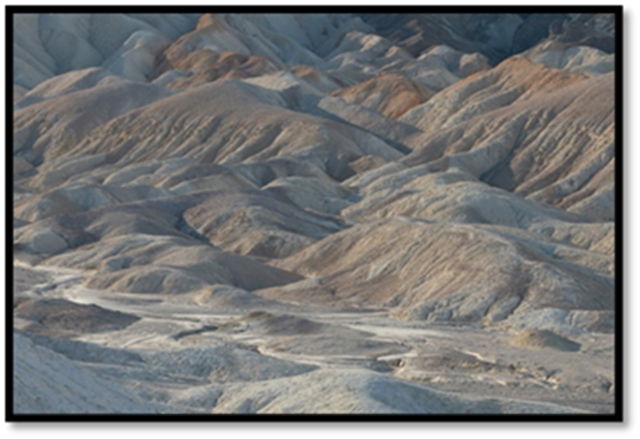
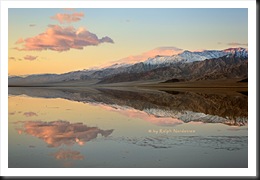
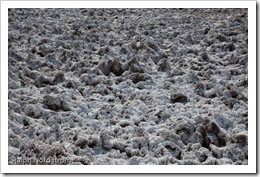
This image was taken in 20 Mule Team Canyon in Death Valley National Park. I was particularly excited about this when I saw it in the field. I was fascinated by the meandering dry stream bead that worked its way across the scene. The ever-present salt in Death Valley stood out white against the soft warm colors of the badlands behind it.

But there were several additional things that excited me. The badlands behind the stream bed also fascinated me and made the experience even richer. It is a concentration of diagonal lines, textures and forms. And the light, while the sun is fairly high in the morning sky, still crosses the badlands at an angle that accentuates its shadows. I intentionally clip_image005overexposed the image 2/3 of a stop to be sure to capture shadow detail and that’s why it looks washed out.
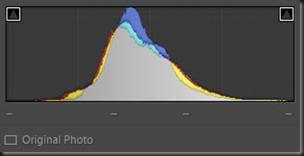
The histogram shows no particular challenges. There is no highlight or shadow clipping. You can see from the thin tail that moves towards the right edge, which was caused by the white salt, doesn’t quite touch it. If I had increased the exposure even a third of a stop more, there would have had highlight clipping on the salt.

Continue reading “Making a Photograph – Taking Flight”

(129)

Photographing Death Valley National Park

Enjoy some of the photographic wonders of Death Valley National Park on an exciting photography workshop.

People sometimes ask me if there’s anything to photograph in Death Valley.  At 5,262 square miles of desert and mountains, it’s one of the largest national parks.  The valley itself is 140 miles long.  Think of it.  It takes three hours to drive from one end to the other.  And surely, in all that space there should be something to photograph.  And yet, most of it is desert.  In fact, the valley itself is the hottest, driest place on earth. It’s also the lowest spot in North America at 282 feet below sea level.  So what’s to photograph?

Mesquite Flats Dunes

Death valley dunes 2011

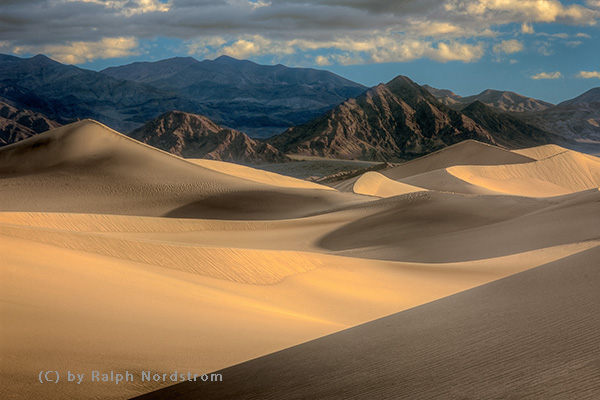
Being a desert you might expect sand dunes and you would be right.  The Mesquite Flats Dunes are in the middle of the valley near Stovepipe Wells.  While not excessively high, they cover a large area and provide wonderful photographic opportunities at both sunrise and sunset.  I prefer sunrise which means heading out across the desert while it’s still dark to arrive at the dunes just as it’s starting to get light.  I go to a place that’s not heavily visited.  It’s an exciting experience.

Zabriskie Point

Zabriskie point pano 140211

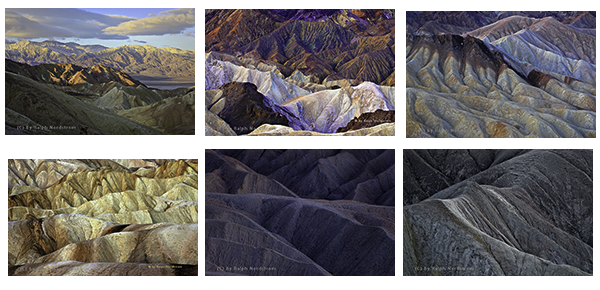
Zabriskie Point is one of the most visited places in Death Valley.  It attracts photographers and tourists alike.  At first it looks like an inhospitable badlands with not much to offer the photographer except a lot of tan wilderness.  But at the right time of day these ‘bad’ lands become extraordinarily beautiful.

Zabriskie collage

It’s all a matter of being there at the right time.

Continue reading “Photographing Death Valley National Park”

(223)

Lightroom Tutorial – Workflow Made Easy

Simplify your Lightroom workflow with these easy steps.

Lightroom is a great tool. It’s quick and easy to use – once you get the hang of it. But sometimes mastering the workflow, the steps you go through to take a raw file to a ‘final’ image, can be a bit daunting.

Let me say up front that Lightroom is an important part of my workflow but it’s not the only part.  Every photograph I work on starts in Lightroom but is completed in Photoshop.  Nevertheless, Lightroom gets a photograph to about 80% of the final product.  I know many people who use Lightroom exclusively and Photoshop only in rare circumstances if at all.

So back to the workflow.  Can it really be made easy?  Yes it can.  There are four major steps (not counting import – see Lightroom Tutorial – Importing Photographs):

  1. Mechanical adjustments like dust spot removal and cropping
  2. Tonality adjustments
  3. Hue adjustments
  4. Saturation adjustments

Let’s skip the first step and start with the second.  The example will be in Lightroom 4.

Continue reading “Lightroom Tutorial – Workflow Made Easy”

(7135)

Making a Photograph – Vision

Develop your vision and express yourself through your photographs.

“This photograph speaks to me.”

The photographs that have a strong impact on us speak to us.  The photographer has created an image that moves us.  Did he or she have something in mind when making the photograph?  Probably so.  Strong images just don’t happen by accident.

As one grows as a photographer one’s vision becomes clearer.  One begins to discover who they are and what they have to say.  And as one’s technical and aesthetic skills develop, skills used in both the field and the darkroom, one’s ability to express their vision becomes stronger.

The artist’s vision is an important element of their art.  The clearer an artist is on what his or her vision is the more expressive their art becomes.

If you’re not clear on what your vision is, live with your photographs.  Become aware of what you associate with them, what stories they are telling you, how they make you feel.  And as your vision emerges nurture it, strengthen it, let it speak through you and your art.  And then your photographs will also speak to others.

death_valley_sunrise_2012

We do photography workshops.  Come on out and join us.  Click here to check us out.

You can also check out our photography.  Click here.

Technorati Tags: ,,,,,,,
WordPress Tags: technical,aesthetic,Photograph,Vision,impact,photographer,skills,artist

(3286)

Mastering Exposure–Histograms Part 3

This is the third post in a series on the histogram. This post discusses the Rocky Mountain histogram, what it is, when you can get it, how to photograph and how to do the post processing.

This is the third post in a continuing series on the oft misunderstood but oh so important histogram.  In the first two posts we discussed the histogram in general.  If you missed them, click on these links.

Mastering Exposure – Histograms Part 1

Mastering Exposure – Histograms Part 2

Recap

To recap, the histogram displays a graph of the tonal values in the scene you are about to photograph.  It shows how the dynamic range of the scene matches and fits into the dynamic range of your camera’s sensor.  There are two critical pieces of information a histogram tells you:

  1. If your exposure is correct
  2. If you have problems capturing the dynamic range of the scene

To recap, the exposure is displayed by the position of the histogram curve within the boundaries of the graph area.  As you increase the exposure the histogram moves to the right.  As you decrease the exposure it moves to the left.  If the exposure is increased so that the histogram moves all the way up against the right side of the graph area you will have highlight clipping. Likewise, if it moves all the way to the left side you will have shadow clipping.

The dynamic range of the scene is displayed as the breadth of the histogram,  The wider the histogram the greater the dynamic range of the scene.  The narrower the histogram the lower the dynamic range.  When the histogram is so wide that it extends from one end of the graph area to the other you are facing a situation where your camera’s sensor will have a difficult time capturing the full dynamic range of the scene.  The worst case is you will have both highlight and shadow clipping.

Continue reading “Mastering Exposure–Histograms Part 3”

(2316)

More Rain on the Way!

We had 4 3/4 inches of rain since Friday and the big storm is still on the way. Heavy rains are forecast through Thursday. I can’t wait for Death Valley. I may have to slip out there in January before the February photography workshop.

(376)

Photographing Death Valley

Death Valley is a wonderful location to photograph and here are a few of my favorite places.

Every year I lead a workshop in Death Valley.  We offer personalized instruction and photograph some of the many exciting locations there.  Click here for more information.

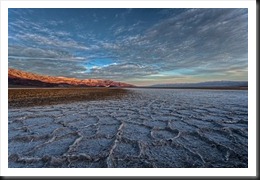
death_valley_reflections_2009Now, the only time you want to be in Death Valley is late fall through early spring.  Otherwise it’s just too darn hot.  Personally, I like February.  It’s kind of a quite time and we’ve had some mighty good luck the last couple of years with major rainfall in the weeks leading up to the workshop.  What this has meant for us is some of the playas were flooded.  When that happens you have lakes six inched deep that spread for miles in every direction.  It doesn’t take a lot of rain to flood the playas either.  Generally an inch will do.

There are some locations in Death Valley that I really love and I’d like to share them with you.

Continue reading “Photographing Death Valley”

(5594)

zabriskie_point_7_2009_600

I thought I knew where I wanted this image to go but it had a mind of its own – beyond realism, beyond believability even, into pure emotion.

(413)

Photoshop Tutorial – Atmospheric Haze

Haze is an integral part of landscape photography.  Distant mountains are not as clear as close up objects.  They lack contrast, are often lighter and may even appear blue or even purple (purple mountain majesty).  It’s interesting that in the history of Western art, painters didn’t incorporate atmosphere into their paintings with landscapes until the Renaissance.

Continue reading “Photoshop Tutorial – Atmospheric Haze”

(5986)

Lightroom Tutorial – Expose to the Right

For a followup post read

http://ralphnordstromphotography.com/wordpress/articles/how-to-articles/expose-revisited/

The light meters in our digital cameras don’t always give us the best exposure.  That’s not to say that they give us the wrong exposure.  But the ‘correct’ exposure doesn’t necessarily produce the best image file as far as post processing is concerned, especially if we’re shooting RAW.

If you expose an image at the exposure selected by your light meter and check the histogram, chances are it’s skewed a little to the left, toward the shadows.  This is especially apparent in low contrast scenes.  The image might look great on the camera’s LCD and in Lightroom.  But a slightly overexposed image will capture more information and is therefore better to work with later – given of course that it’s not so overexposed that you have highlight clipping.  An ideal histogram is one that is just to the right of center.  This technique is called ‘Expose to the Right,’ and is practiced by many of digital photographers.

Continue reading “Lightroom Tutorial – Expose to the Right”

(7852)