Taking Your Photography to the Next Level

Our art, photography, can be a rich and rewarding endeavor and an ever fascinating journey of self-discovery. Be open to the possibilities and hone your skills. Become really good at what you do best.

“Did you manipulate your photograph?”  “Did you use a filter?”  “Do you use a Mac?” “Do you crop your images?” “I’ll have a nicer day than you; I’m not shooting a Canon.”  Yes, someone actually said that to me at Bridal Vale Falls in the Columbia River Gorge of Oregon in response to my cheery, “Have a nice day.”  I guess when you take the entire population of photographers you will always find those that are prejudiced and closed minded just like any other population.  They think they are right and anyone that disagrees with them is wrong.  It’s that simple.

The current issue of Lenswork magazine, the premier journal for black and white photography, has an article by guest contributor Jim Kasson titled “Previsualization in the Digital Age.”  I couldn’t wait to read it.  In my workshops and lectures I’ve always advocated that an artist interprets reality and communicates that interpretation through her or his art.  In landscape photography I’ve encouraged our workshop attendees to leave their camera gear in the car until they connect with a location and only then set up their cameras to try to capture what is is they are experiencing.  Previsualization, the anticipation of what the finished work will look like, is a big part of communicating what you are feeling.

Continue reading “Taking Your Photography to the Next Level”

(4504)

Is HDR a Four Letter Word?

Is HDR really a four letter word or is it a powerful technique that let’s capture images we would have had to pass up in the past?

HDR.  Many people respond to those three letters in shock and disgust.  For them, HDR is synonymous with over the top processed images.  It embodies all that they think is wrong with digital photography and the implied MANIPULATION that goes with it.  It is a shocking insult on reality.

I’ve heard of photography contests that strictly forbid HDR and insist that all the photographs that are submitted be a single exposure.  I’ve judged photography competitions in which the other judges viewed an HDR image that was just slightly over the top and felt it should be placed in the Manipulated category.

But the letters HDR stand for High Dynamic Range.  Nothing sinister about that.  It’s a situation frequently encountered when out photographing.  That’s when the dynamic range of the scene, the difference between the darkest and brightest spots in the scene, is greater than the dynamic range our camera’s sensor is capable of capturing.  When we encounter this situation we’re going to get clipping where the highlights or shadows or both lack detail, are blank.  This is not a desirable situation.  If there’s anything that’s shocking here it’s that the camera, that supposedly great recorder of reality, does not, cannot see what our eyes see.  So what can be done about that?

Well, if you’re shooting color film the answer is simple. Nothing.  Move on.  You’ll never be able to capture high dynamic range images on color film (without clipping) no matter how beautiful they are.  If you are shooting black and white you can do what Ansel Adams did – water bath development.  He exposed for the shadows and adjusted his development process and chemicals to get a proper development of his highlights.  Sounds to me like he’s doing what we digital photographers do with HDR – adjusting the process to capture the full dynamic range (Read “How Ansel Adams did HDR”).

If you’re a digital photographer you can use the HDR technique – capture two or more images with bracketed exposures that span the dynamic range and then blend them together using software like PhotoMatix Pro.  So where’s the problem?  I mean, doesn’t that sound like a good thing, taking photographs we weren’t able to do at all with color film or with great difficulty with black and white?

But somehow HDR has become a four letter word in some circles.  It’s become synonymous with that word that is so offensive to some – MANIPULATION.  HDR images are manipulated images.  Never mind that HDR can be used to create photographs that are a lot more like what our eyes see than what our cameras are even remotely capable of capturing.

Many of these same people that think that HDR is a four letter word are also prone to look down their noses and ask, “Did you PHOTOSHOP that picture.”  Yes, with Photoshop we can easily drop in moons that weren’t there.  And our photographs are cheap because of that.  But it was OK in the days of film when the masters that we so admire did it.  What’s the difference?  Is it that it was hard when you did it with film and therefore to be admired but it’s easy with Photoshop?  Don’t know.  Could be.

And with HDR a similar thing might be happening.  With the software tools that are available you don’t have to settle for recreating what our eyes saw, you can take your images over the top, give them that grunge look.  Or that painterly look.  It’s up to you and your vision.

Now, for the record (not that it’s important) I choose not to go for the grunge or painterly look in PhotoMatix Pro.  I prefer to control the dynamic range, remove highlight clipping and return an image to Lightroom that I can continue to work on.  And when it comes to moons in my  photographs I prefer to be there when the full moon comes up behind my  favorite bristlecone pine.  It’s a lot more fun that way.

But I have no argument with those that drop moons or cloudy skies or whatnot in their photographs.  And I have no argument with those that choose to express themselves with grunge HDR images.  I readily confess that some of them are extremely effective with the grunge look.  That’s just not my style, not my personality.

The only thing I think we all owe our viewers is to be honest about it.  When people come into my booth at an art festival and ask if I manipulate or Photoshop my photographs I  answer, “Of course.”  I often go on to say, “Let me put it this way.  I approach photography from the mindset of a painter.  I want to have all the creative freedom a painter would have.’”  And more than once, they have responded, “Oh, I get it.  You’re an artist.”

Smile

Love it when that happens.


What do you think of HDR?  What do you think of manipulation in Photoshop?  Leave a comment.  We’d love to hear your opinion.

If you found this post interesting or relevant please feel free to share it on Facebook, Twitter or the like.

Join me on an upcoming workshop.  Click here for more details.

To see more of my photographs click here.

WordPress Tags: Four,Letter,Word,Many,images,photography,MANIPULATION,exposure,judges,image,category,High,Dynamic,Range,situation,difference,sensor,highlights,shadows,Move,Ansel,Adams,development,Read,technique,PhotoMatix,PHOTOSHOP,Could,tools,grunge,vision,Lightroom,argument,viewers,booth,festival,mindset,painter,freedom,artist,Love,competitions,chemicals,exposures,digital,camera,black,software,were,moons

(1998)

HDR for Every Day

How can you get great color photographs in the middle of the day? Read this post to find out.

We landscape photographers tend to avoid photographing during the middle of a sunny day.  The light is harsh with no color.  We prefer golden hour or twilight.

But there are times when we have no choice as to when we can shoot.  When we’re on vacation with family we can’t wait until sunset at every location that sparks our interest.  So we get the shot and hope for the best.  But there’s a technique we can use that will greatly enhance our chances of capturing a more compelling photograph.

Continue reading “HDR for Every Day”

(1830)

Lightroom Tutorial – Polarizer Filter

How do simulate the effect of a polarizer filter in Lightroom.

A Polarizer filter is generally the first filter a landscape photographer buys.  It is so versatile.  It can darken blue skies, reduce harsh reflections and intensify colors.  Many photographers put polarizers on their lenses and never take them off.

But this is a Lightroom tutorial.  So why in the world am I talking about polarizer filters?  Well, it’s because I have a trick I’d like to share with you, one that I’ve never seen discussed anywhere else.  It’s what you can do in Lightroom to create the polarizer effect without a polarizer.  In fact, it can be better than the real thing, especially if you are shooting with a wide angle lens.  Because, the angle of view can be so great that part of the sky will be affected by the polarizer and the rest will not.  So it looks pretty unnatural when the sky in part of your image is dark and the rest is washed out.

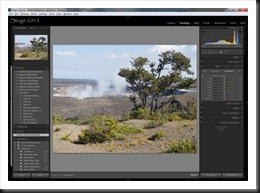
So, what’s the trick?  Well, consider this image taken on a recent trip to Hawaii.  I shot it with my Canon G11 and I don’t even own a polarizer filter for it.  It’s a photograph of the ongoing eruption in a crater in the Kilauea caldera.  In the bottom of the crater is a lake of lava.  The smoke you see is a plume of noxious gas.

polarizer_1

(Click on the image for a larger view)

Continue reading “Lightroom Tutorial – Polarizer Filter”

(19584)

Lightroom Tutorial – When You Get Home

There’s a lot of talk about workflow. But it all begins with importing, organizing and selecting your photo files when you return from the workshop.

I recently returned from seven fantastic days of an exciting photography workshop in the Eastern Sierra (any day or night in the Eastern Sierra is fantastic).  I organized all of my photographs in Lightroom.  And I thought it would be a good idea to share the steps I go through in case you might find it useful.

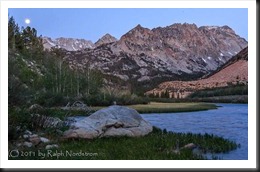
eastern_sierra_120605__SM31668

Import

I try to keep up with importing the photographs from the day’s shoots into the copy of Lightroom running on my laptop.  I’m not going to go into the specifics of the import process but you can read about it here.

Lightroom Tutorial – Importing Photographs

I’ve set up Lightroom to apply certain adjustments to the files as they are imported.  For example, Lightroom applies adjustments in the following Developer areas – Basic, Tone Curve, Detail (capture sharpening), Lens Correction (lens make and model) and Camera Calibration (Process and Profile).  The details are spelled out in this post.

Lightroom Tutorial – Camera Specific Presets

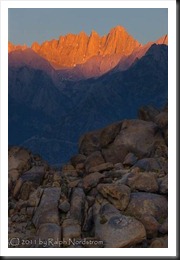
eastern_sierra_120604__SM31524

Continue reading “Lightroom Tutorial – When You Get Home”

(2690)

Lightroom Tutorial – Importing Photographs

Get post processing started by importing your photographs into Lightroom.

An important part of post processing is importing your photographs into Lightroom.  The goal is to copy the files from your camera or laptop and store them on your desktop computer.  At the same time you also want to make a backup of all of your files.

You might be interested in the configuration of my desktop computer.  It has about 5 terabytes of storage.  This is where the image files will be stored.  I also have several terabytes of external storage – external hard drives.  This is where the backup copies go.

In this example I’ll be copying files directly from the camera.  The plan is to copy the files as they are to the backup storage.  But the files I store on the desktop storage will be converted to DNG format.  More on that in another post.

So with the big picture in mind, let’s get into the details.

Continue reading “Lightroom Tutorial – Importing Photographs”

(3451)

Lightroom Tutorial – Diamonds in the Haystack

So you’ve come back from a shoot with hundreds of not thousands of files. How do you find the diamonds in such a large haystack?

I got a comment on a recent post on workflow.  (Lightroom Tutorial – Workflow)

The question was if there was a way in Lightroom to sort through a large number of photographs to select the ones you want to work on.

Here’s the situation.  You’ve just returned from a five day workshop.  And you have a thousand or so photographs.  Now we know that not everyone of these images is a keeper.  Personally, I’m delighted if I get four or five keepers from a five day workshop.  Hey, given the vagaries of weather and light, I’m happy if I get one.

But the prospect of sifting through hundreds and even thousands of images can be a bit overwhelming.  So here’s what I do.

Continue reading “Lightroom Tutorial – Diamonds in the Haystack”

(2003)

Making a Photograph – Black and White Points

Add snap to your photographs by adding contrast. This step-by-step shows you how to set black and white points in Lightroom.

There are a lot of instructional books on how to use Lightroom, Photoshop, Photoshop Elements and the like.  They provide a comprehensive and in-depth review of the various adjustments and filters available in these powerful tools.  And as such they serve as excellent references.  I own many of these fine books.

Now, a lot of workflows are built around the concept of seeing what needs to be fixed next and fixing it.  I advocate a more structured approach; namely, fix the tonality first, then the hue and finally the saturation.  See my recent post on Workflow.  But I often hear the statement, “I look at my photograph and just don’t know what to do.”  Many people often don’t know where to begin.

So I want to take a different approach.  I want to look at an image and identify what it needs and then talk about the various techniques for achieving it.  In other words, I want to start with the question, “What makes a compelling photograph?” and go from there.  It doesn’t help to know all of the tools and tricks available in Lightroom and Photoshop if you don’t know when to use them.

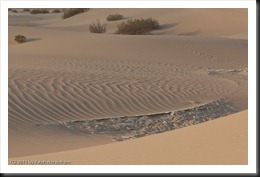
We’ll start with this image.  It is photographed in the Mesquite Flats Dunes of Death Valley.  The dunes provide an inspiring variety of compositions and ligh.  (You can click on this and all other images in this post to enlarge it.)

BP WP Dunes-1

Let’s start by examining the images tonality and see what improvements can be made.


Continue reading “Making a Photograph – Black and White Points”

(11448)

Lightroom Tutorial – Workflow

An overview of a very effective Lightroom workflow.

There are about as many definitions of “fine art photography” as there are people who call themselves “fine art photographers.”  For many of us, fine art photography is an expression of our view of the world.  Much of what we see in the world is captured in the images we capture in the field.  But that’s not the whole story.  Why?  Because the true expressive quality of our photographs comes to life in the post processing – the digital darkroom if you will.

Continue reading “Lightroom Tutorial – Workflow”

(2768)

Exciting Nighttime Photography in 10 Easy Steps

Here is a simple 10 step process to capture both star trails and nighttime sky photographs at the same time.

Nighttime photography is a lot of fun, gaining greater popularity and attracting more and more photographers.  I’ve been exploring the various techniques and want to share with you the one I like the most.  Now, I don’t pretend to be a master at nighttime photography.  I’ll leave that up to the legends like Wally Pacholka.  But we can still have a lot of fun and come away with some very nice images.

Continue reading “Exciting Nighttime Photography in 10 Easy Steps”

(23120)